Anıl Tuluy
Blog Post
DIGITAL DESIGN FUNDAMENTALS
ON MAY 09, 2025 / GAME DESIGN
Despite several years in game development, I still feel I haven’t fully mastered concepts like Sprites, Meshes, UV Mapping, Shaders, and PBR.
So today, I decided to make a small chat with Gemini in order to refine my understanding on how a digital object -whether flat or three-dimensional- actually gets its look. It was a very fruitful conversation and I could take the following key notes:
1. The Foundation: Understanding 2D Sprites
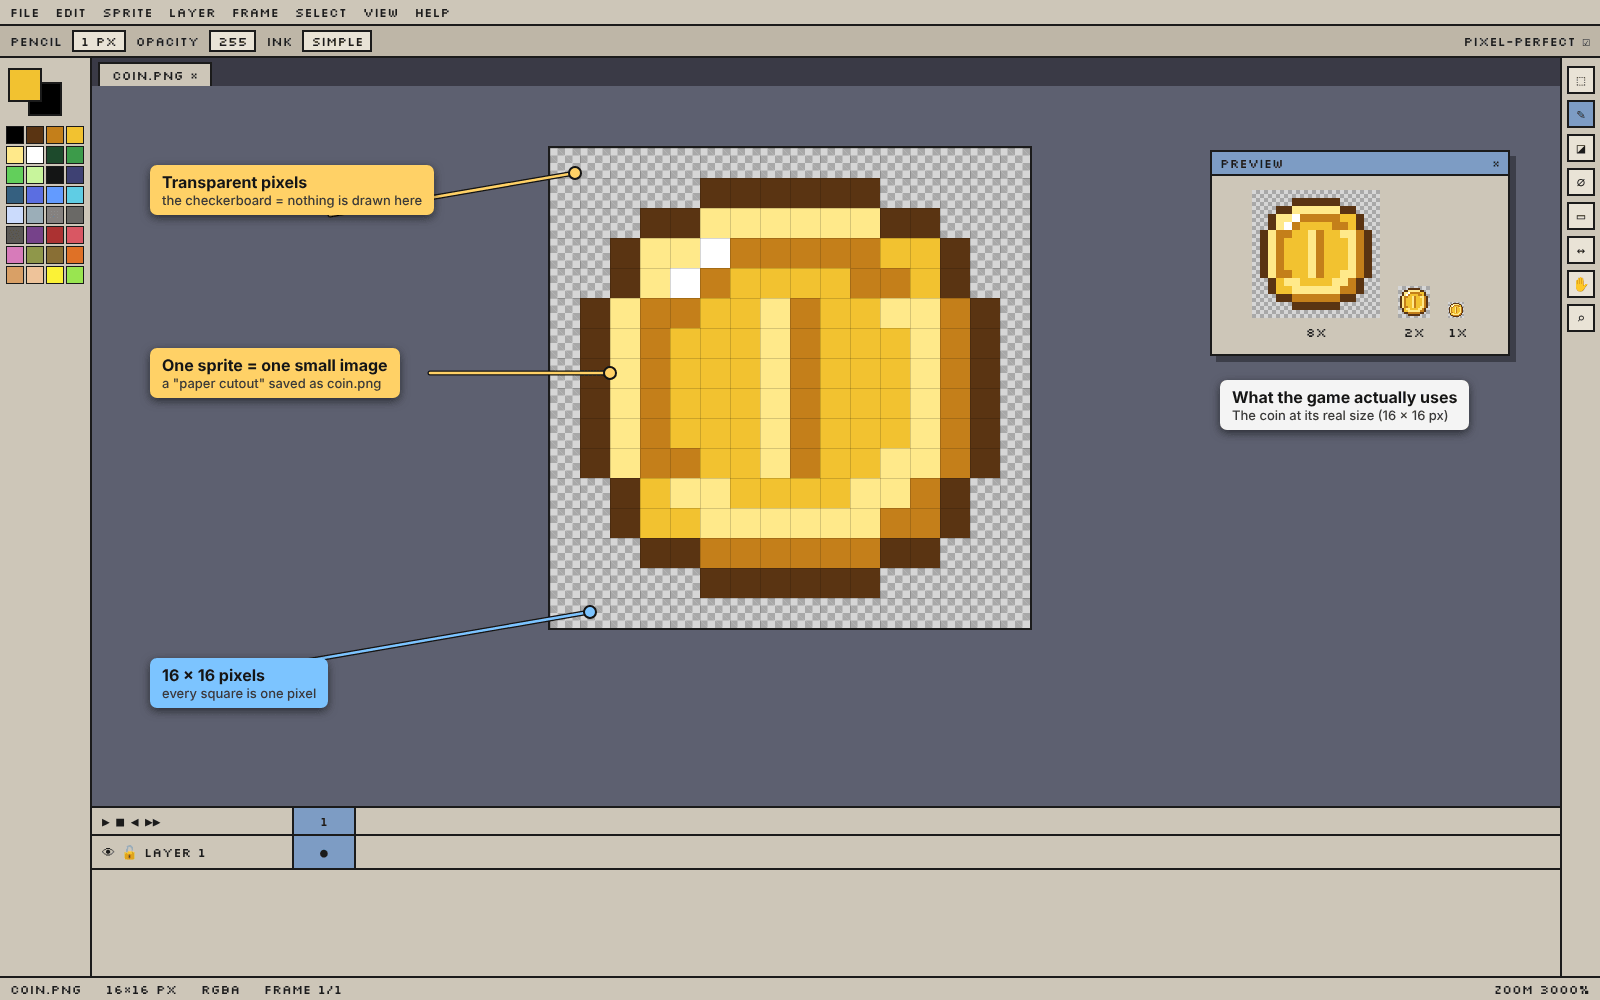
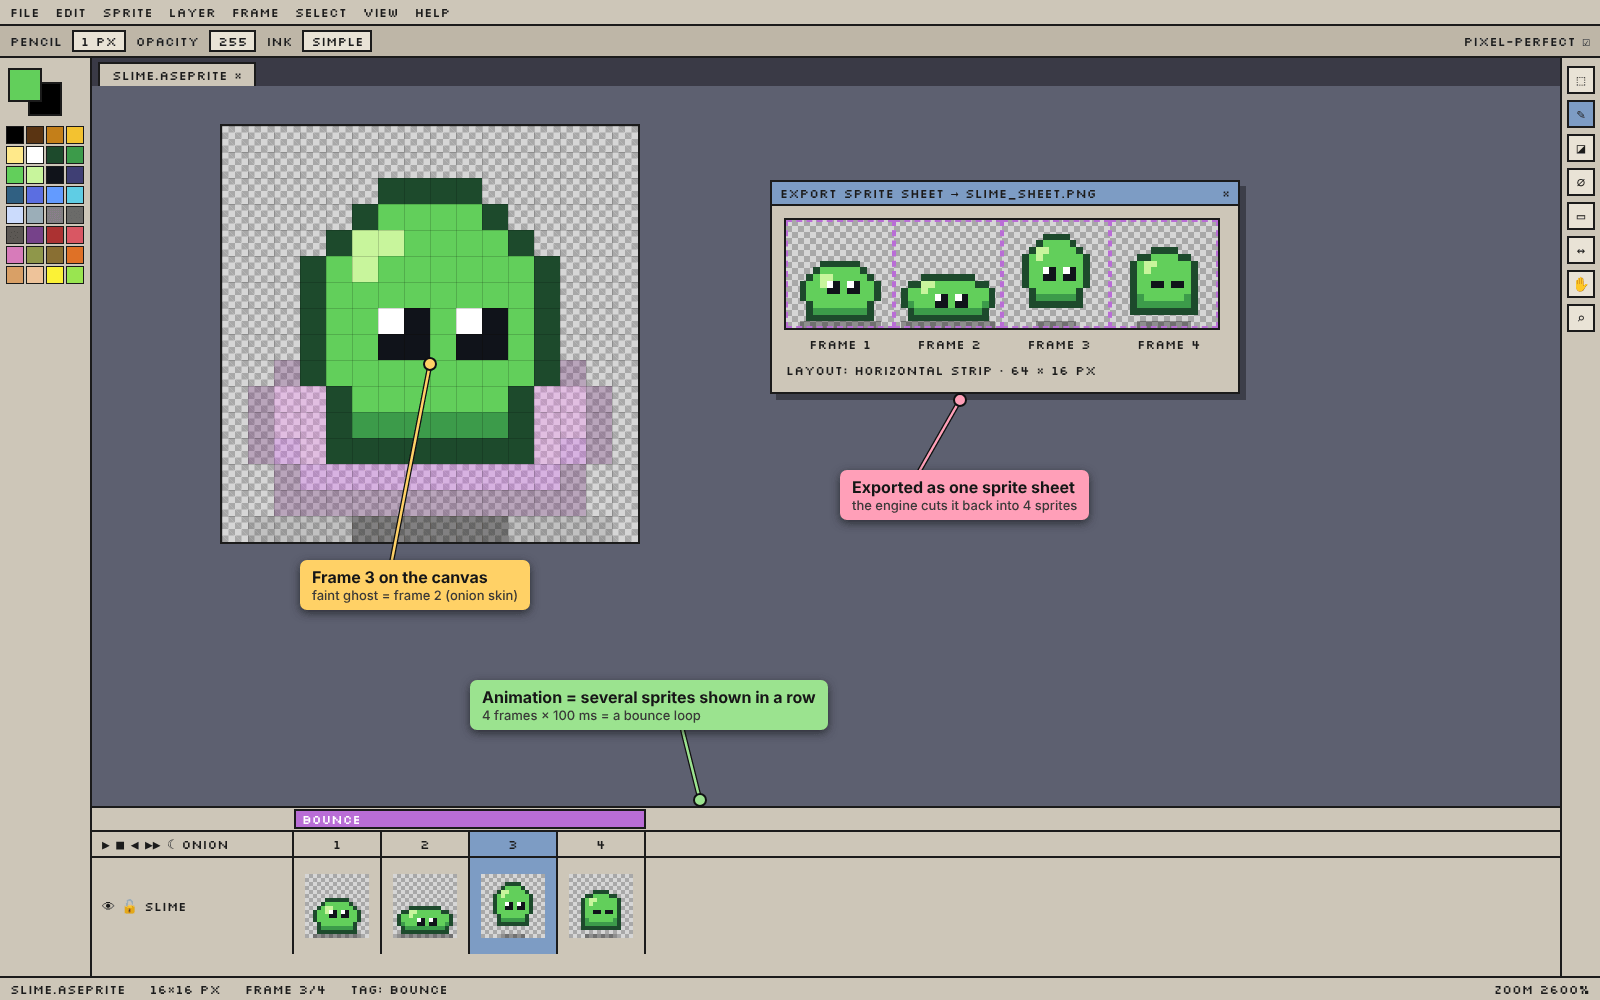
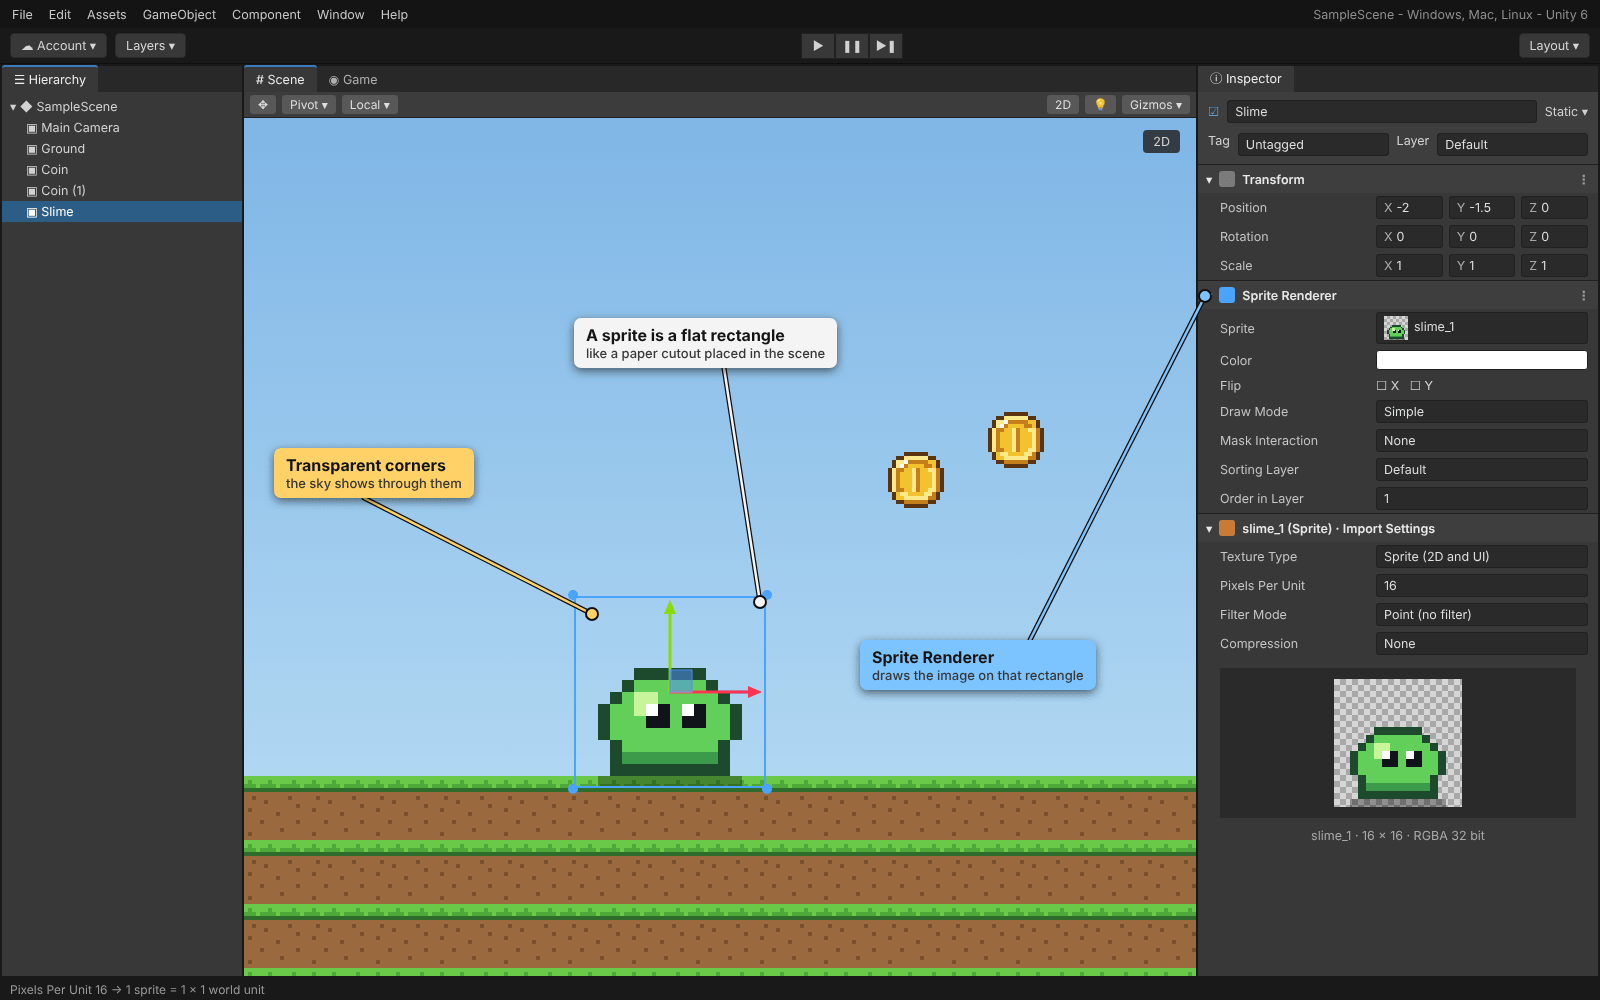
In 2D design, a sprite is a single image or an animation frame that acts as a standalone object in the game world.
We can think of a sprite like a paper cutout. It is a flat, rectangular image—usually a .png to allow for transparency—that represents a character, a coin, or a background element.
2. The 3D Anatomy: Mesh, Texture, and Materials
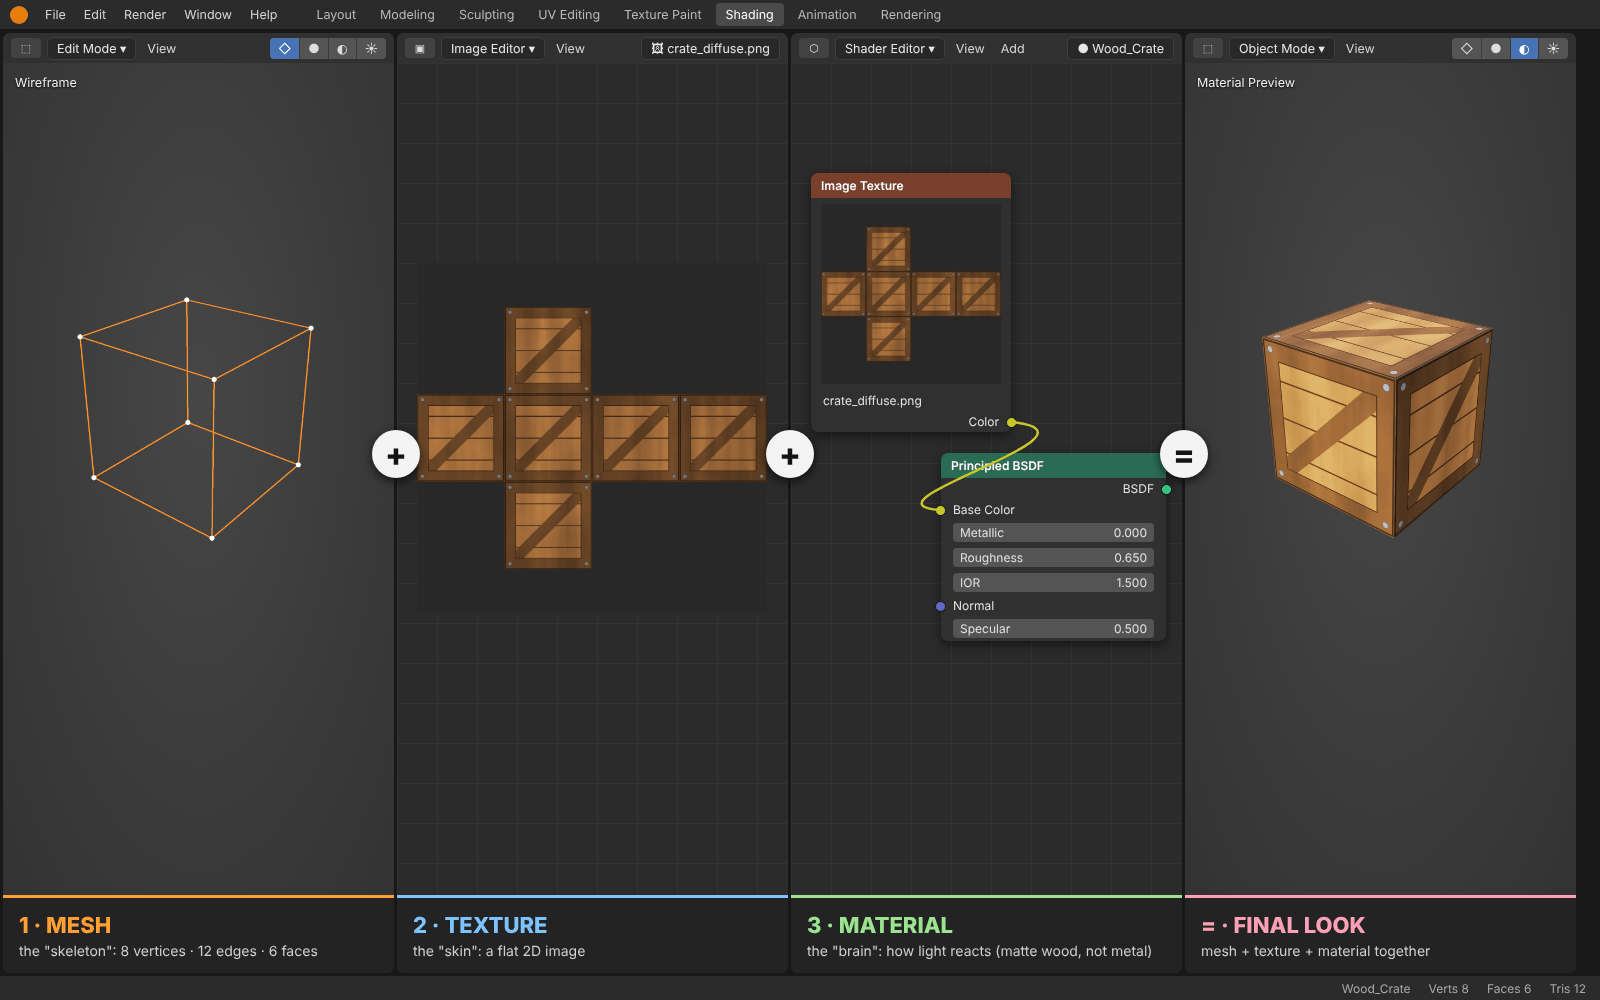
When we move into 3D, the “paper cutout” becomes a physical structure. To understand a 3D object, we can look at it as a three-layer sandwich:
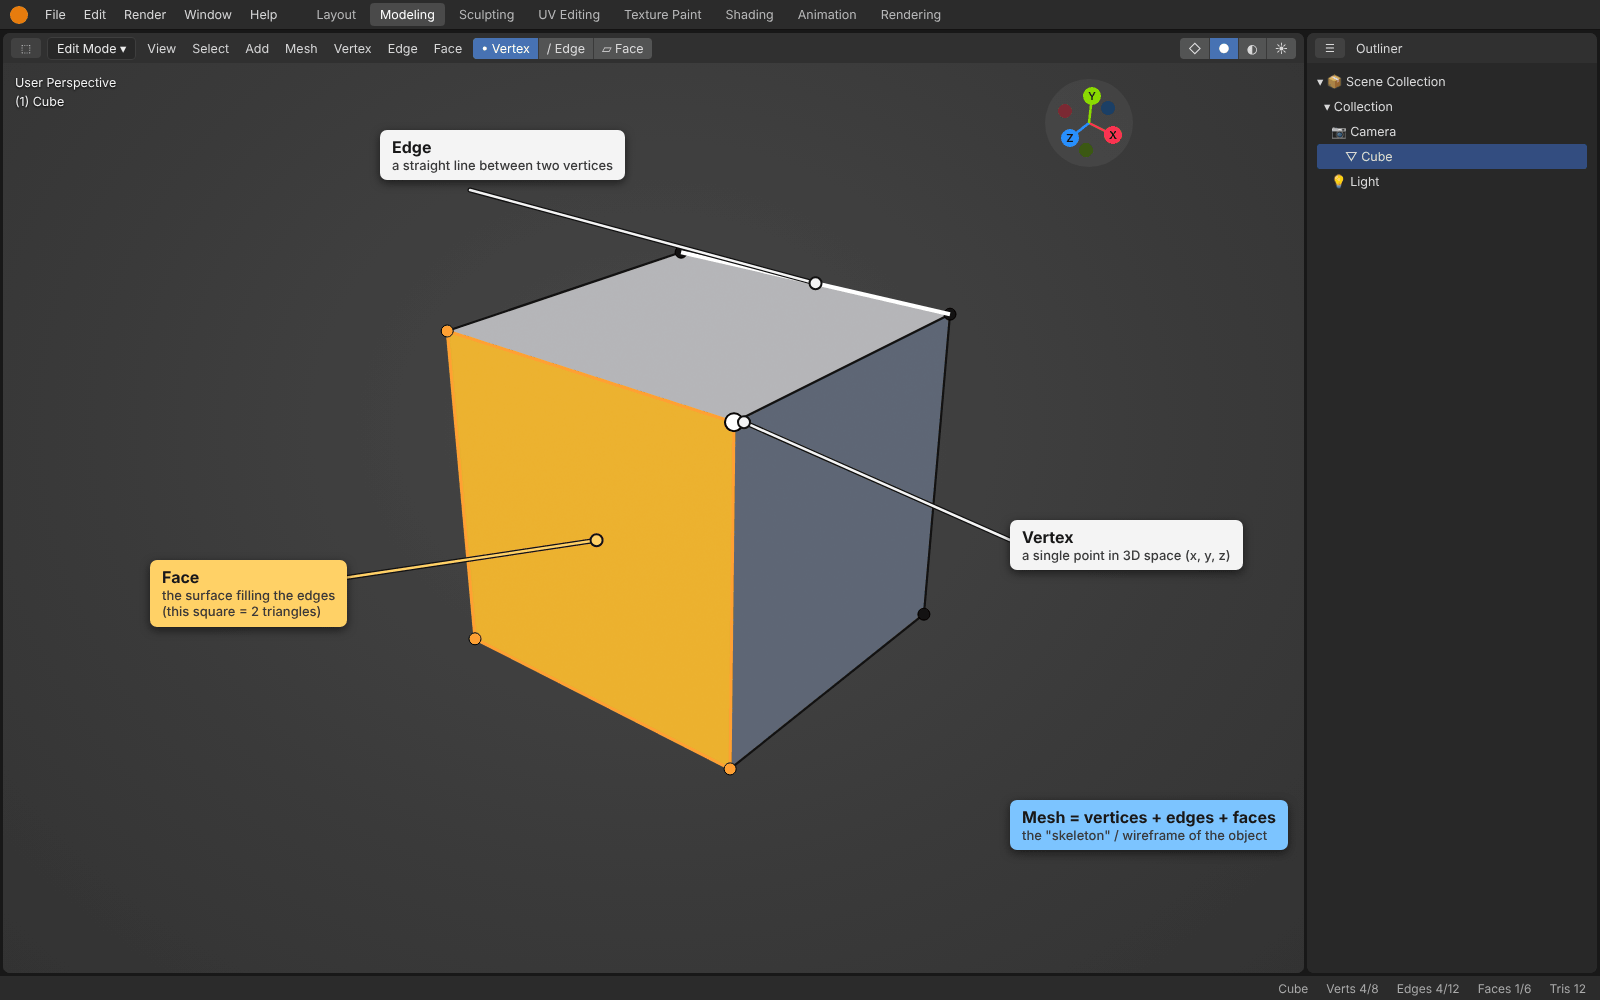
The Mesh: The “skeleton” or wireframe (the 3D shape made of vertices and faces).
The Texture: The “skin” (a 2D image file that provides the detail).
The Material: The “brain” (the set of instructions that tells the computer how to handle light and reflections).
3. The Bridge: UV Mapping
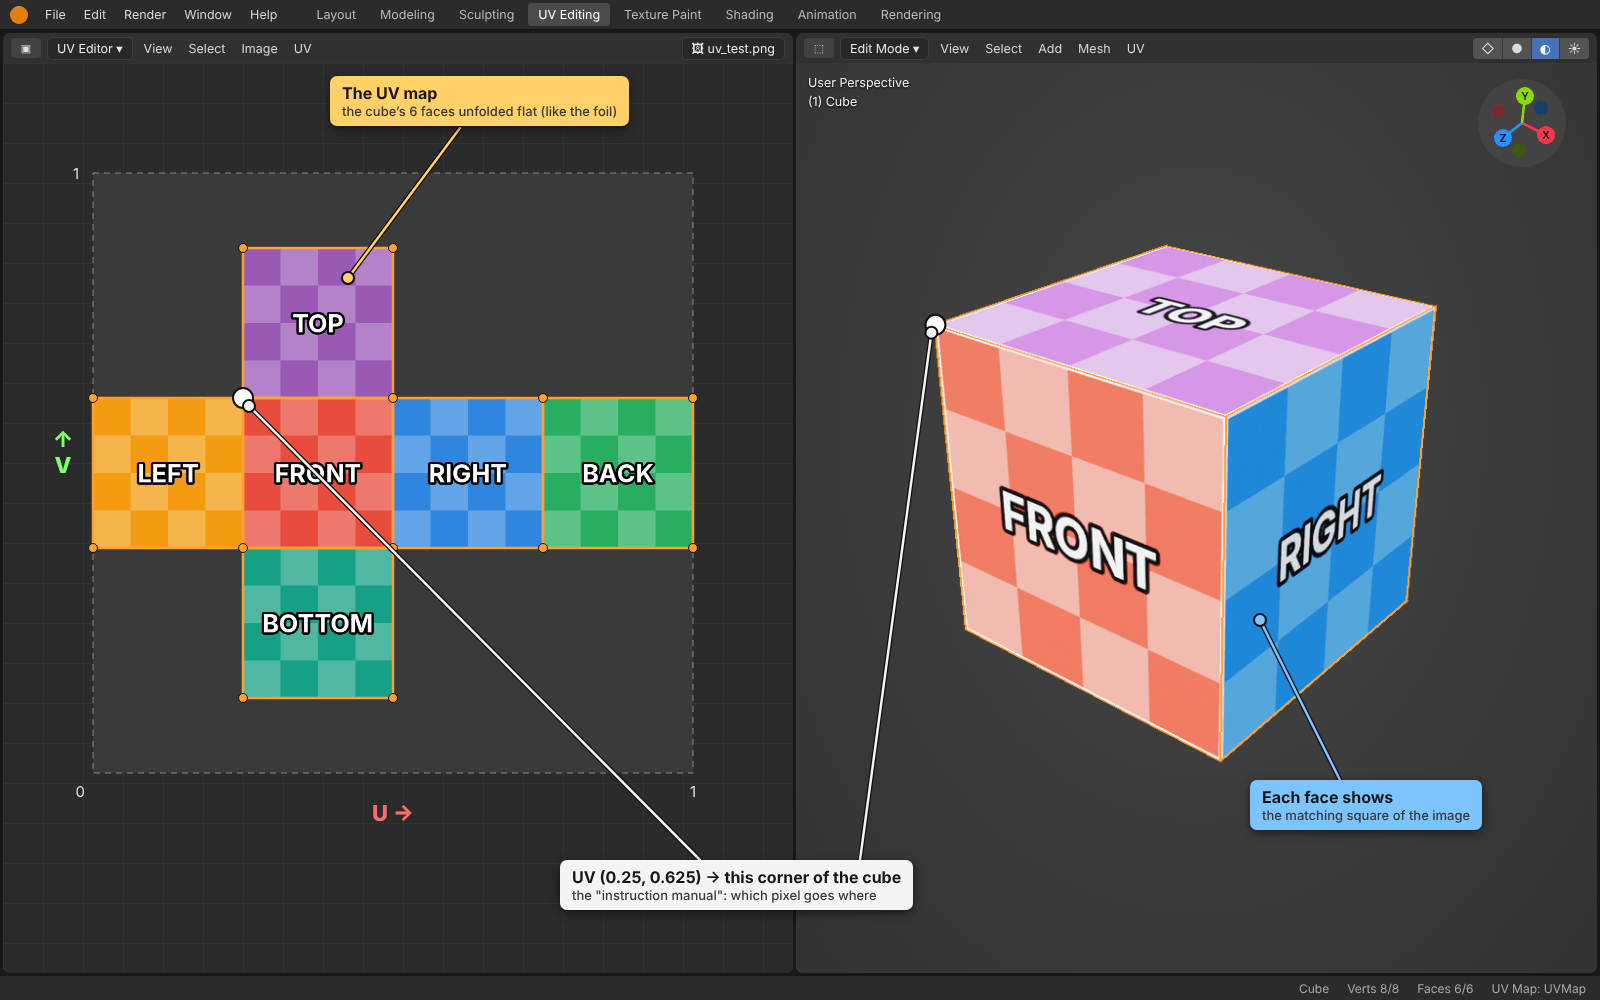
As mentioned in “The 3D Anatomy” part, the texture is a flat 2D image wrapped around the 3D shape. But how does a flat 2D image wrap around a complex 3D shape? That’s where UV Mapping comes in.
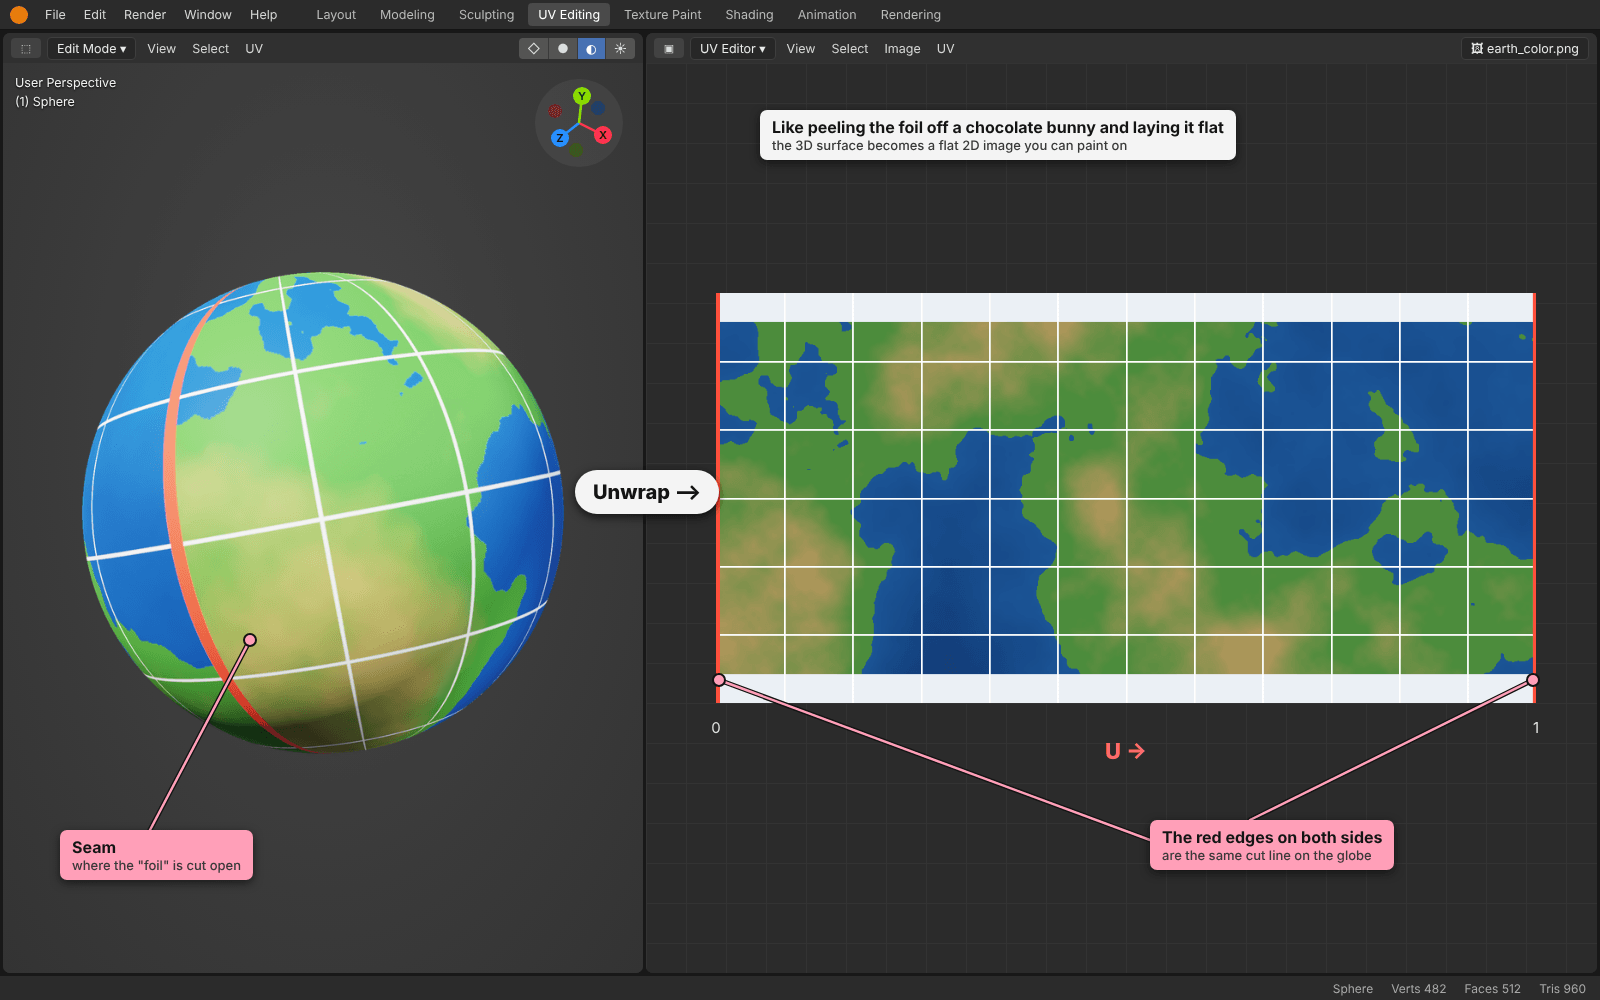
Gemini gave me the nice example of the chocolate bunny (could be also the chocolate Santa Claus). A hollow chocolate bunny wrapped in patterned foil. If we carefully unwrap that foil and lay it flat on a table, we can see a UV Map.
Why is it called UV mapping:
Since X, Y and Z coordinates are used for 3D space, we use U and V for the coordinates on the 2D texture map. It’s the “instruction manual” that tells the computer which pixel goes on which corner of the 3D model.
4. The PBR Workflow
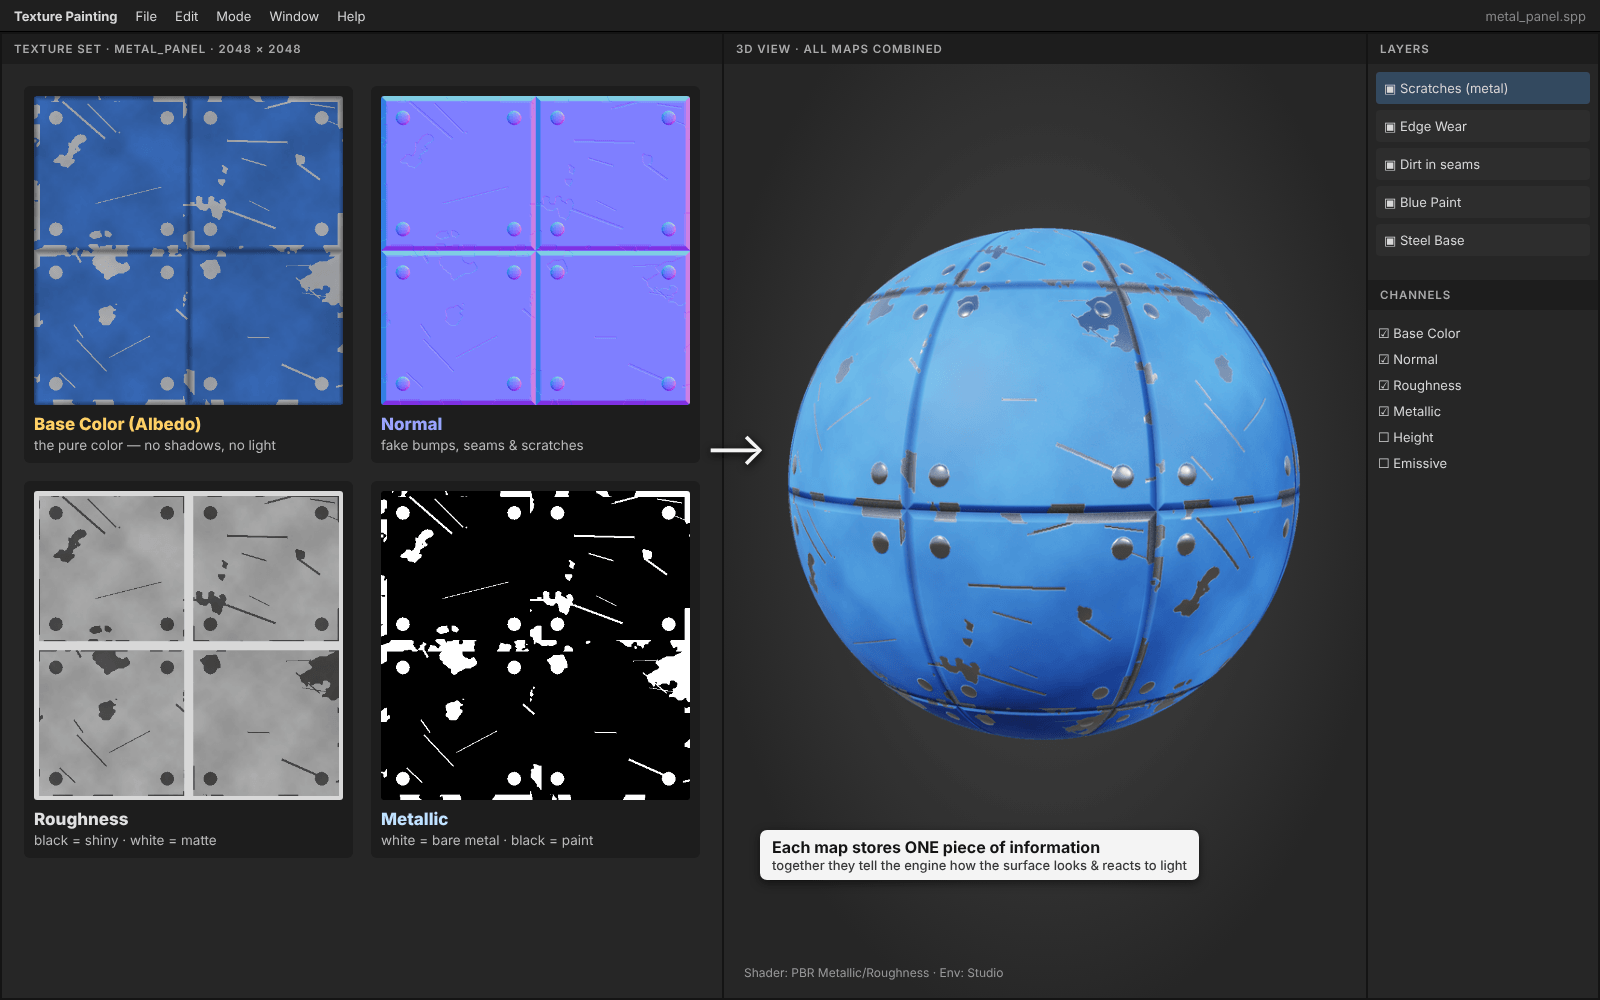
In digital design, we don’t just use one image for color. We use a Texture Set known as PBR (Physically Based Rendering). There are several so called maps, where each map provides a specific piece of data. The mostly used of them are:
Albedo / Base Color Map (The “No-Shadow” Color):
The pure color (without any baked-in lighting).
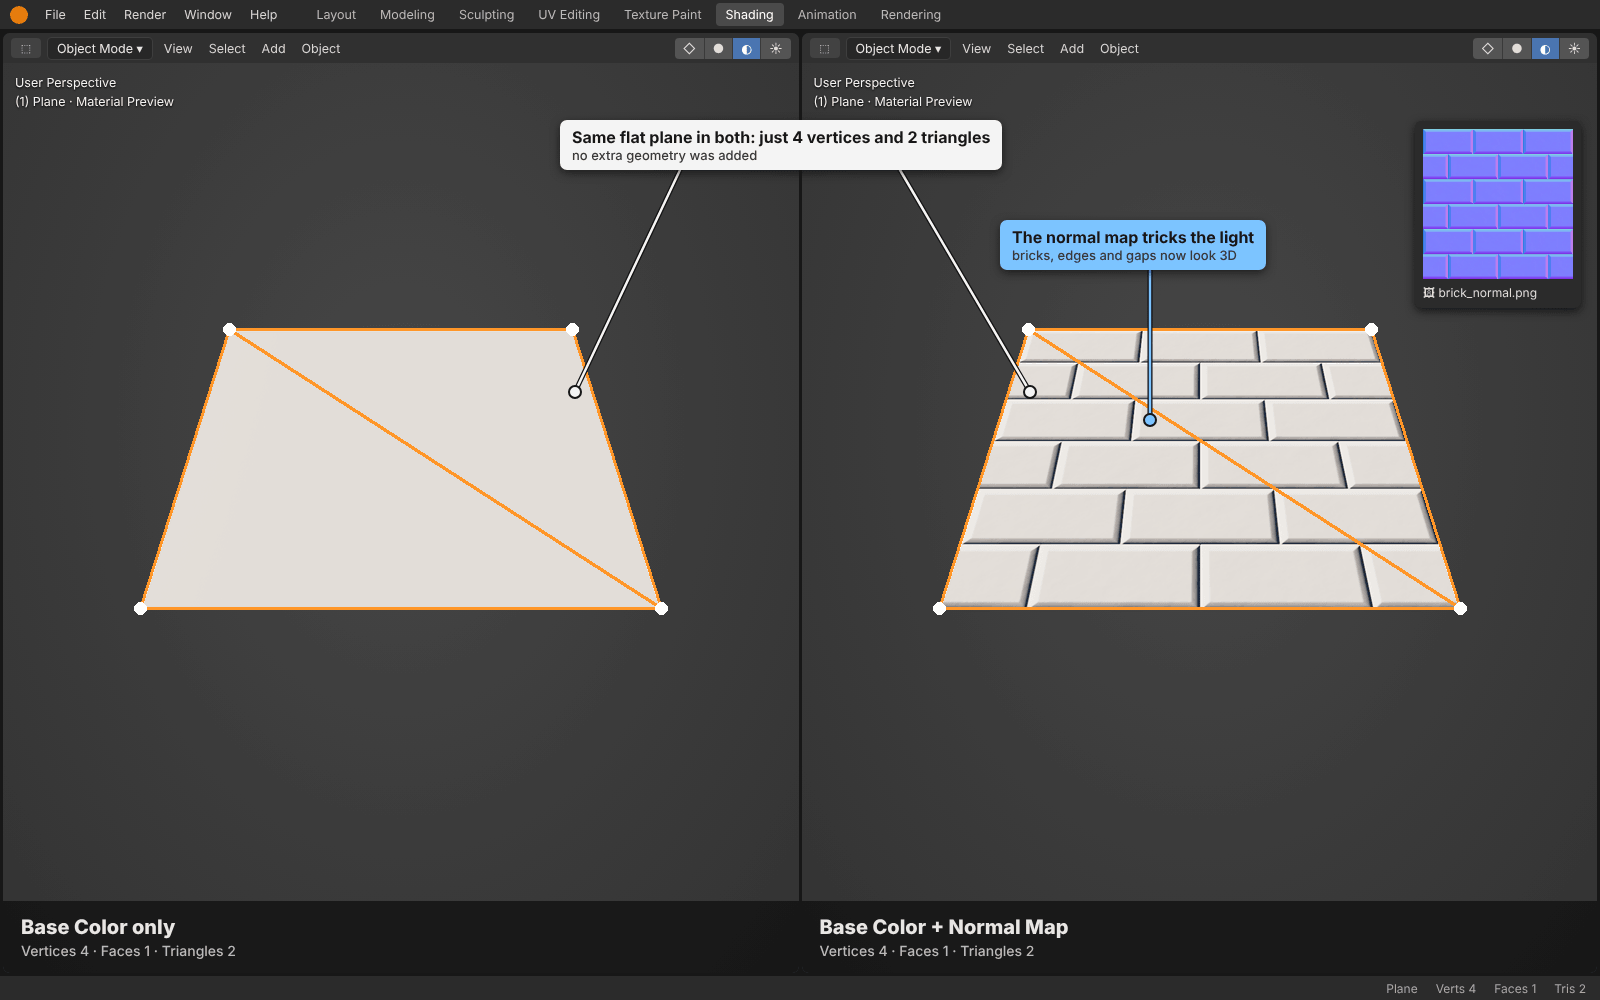
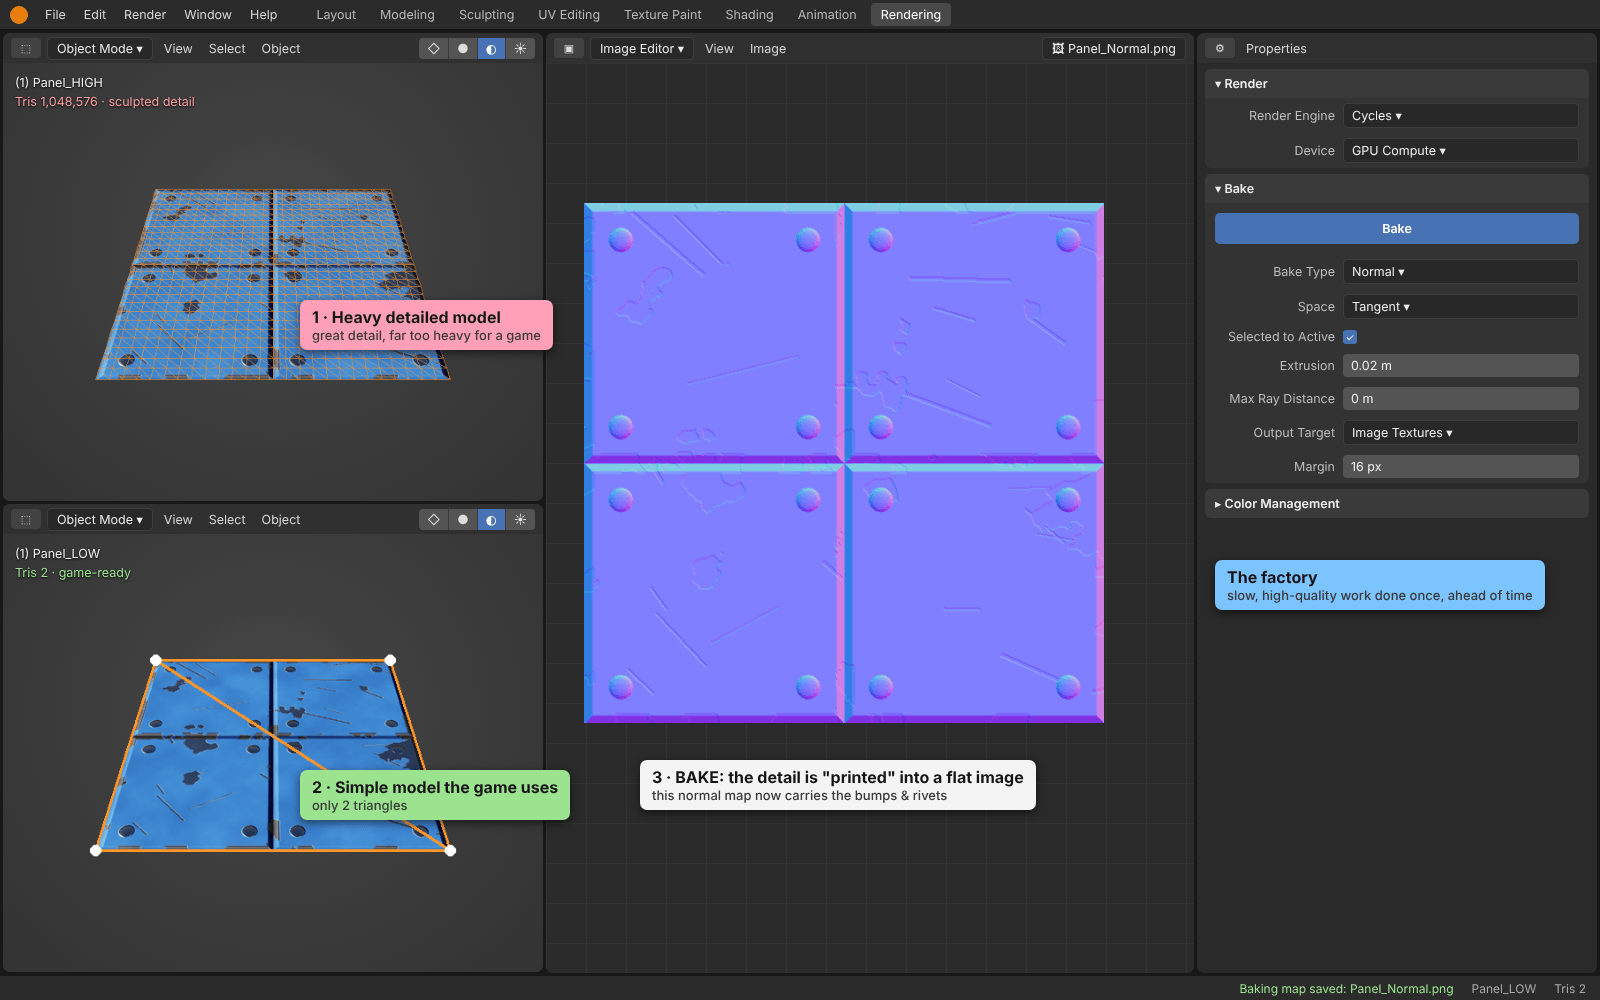
Normal Map (The “Fake Detail” Map):
Using a normal map we can add surface bumps and scratches without adding extra geometry to the mesh. It is a specialized map that tricks light into seeing surface bumps and scratches.
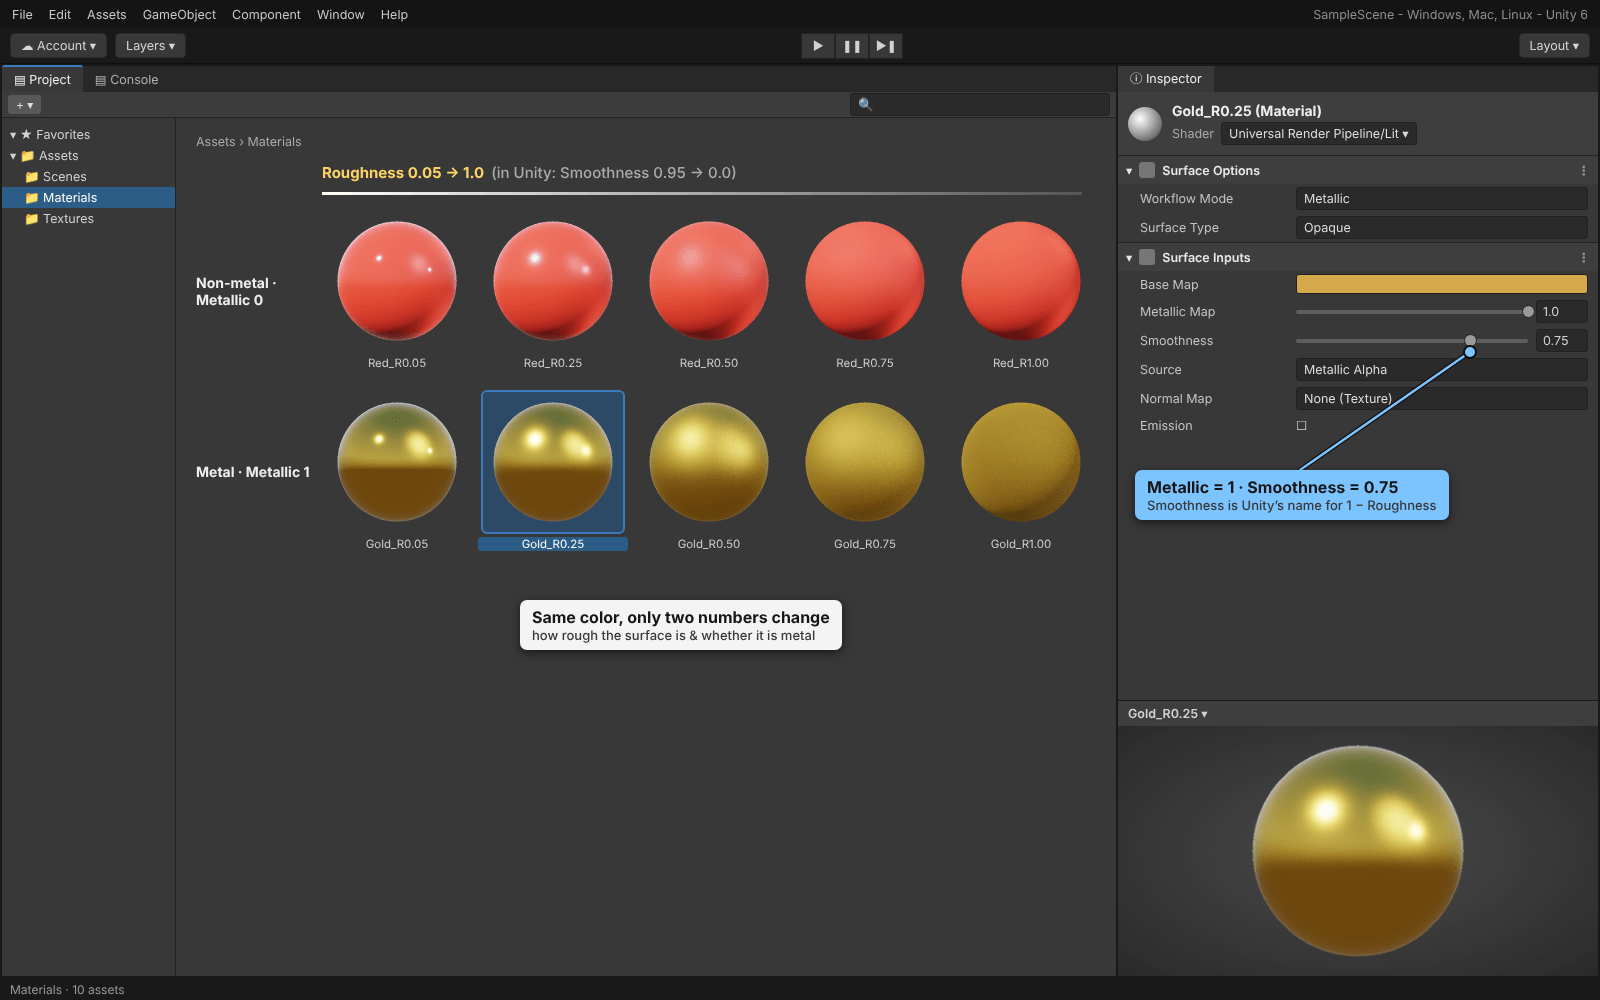
Roughness / Metallic:
These are grayscale maps that define how “shiny” or “metallic” a surface feels.
Why using a texture software and a game engine shader graph?
Seems to be a very common question in the game development industry. Here is what Gemini gave as an answer:
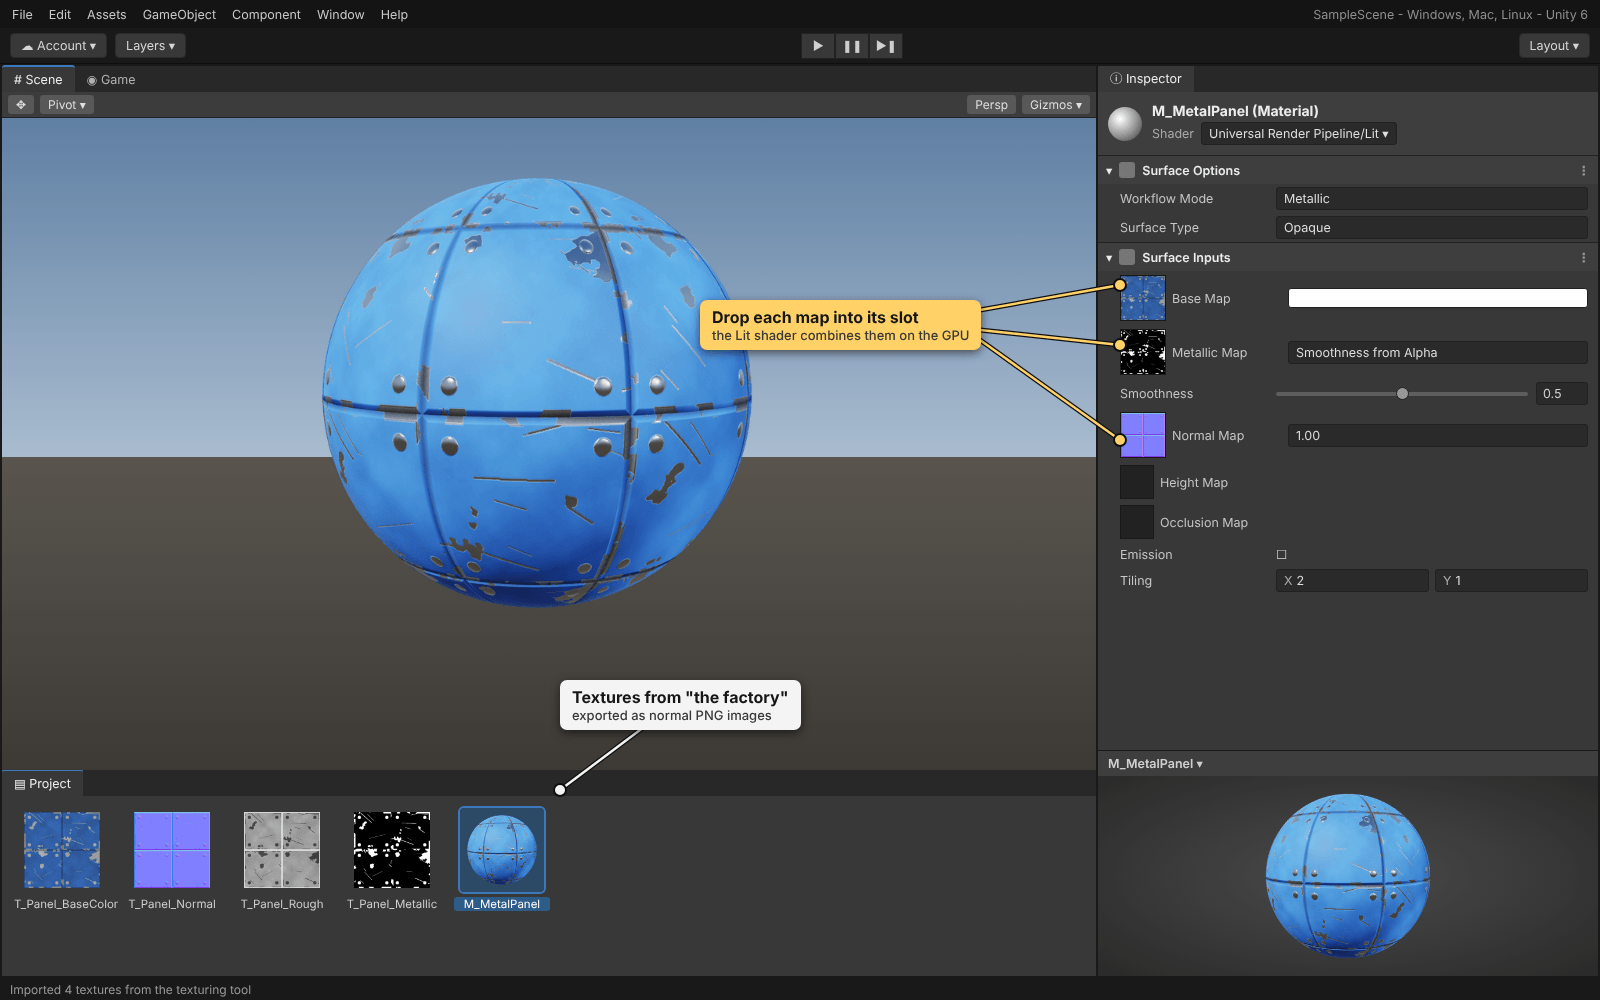
The Factory (Substance/Blender):
Here, we “bake” our math into flat images. This is about high-fidelity, static detail.
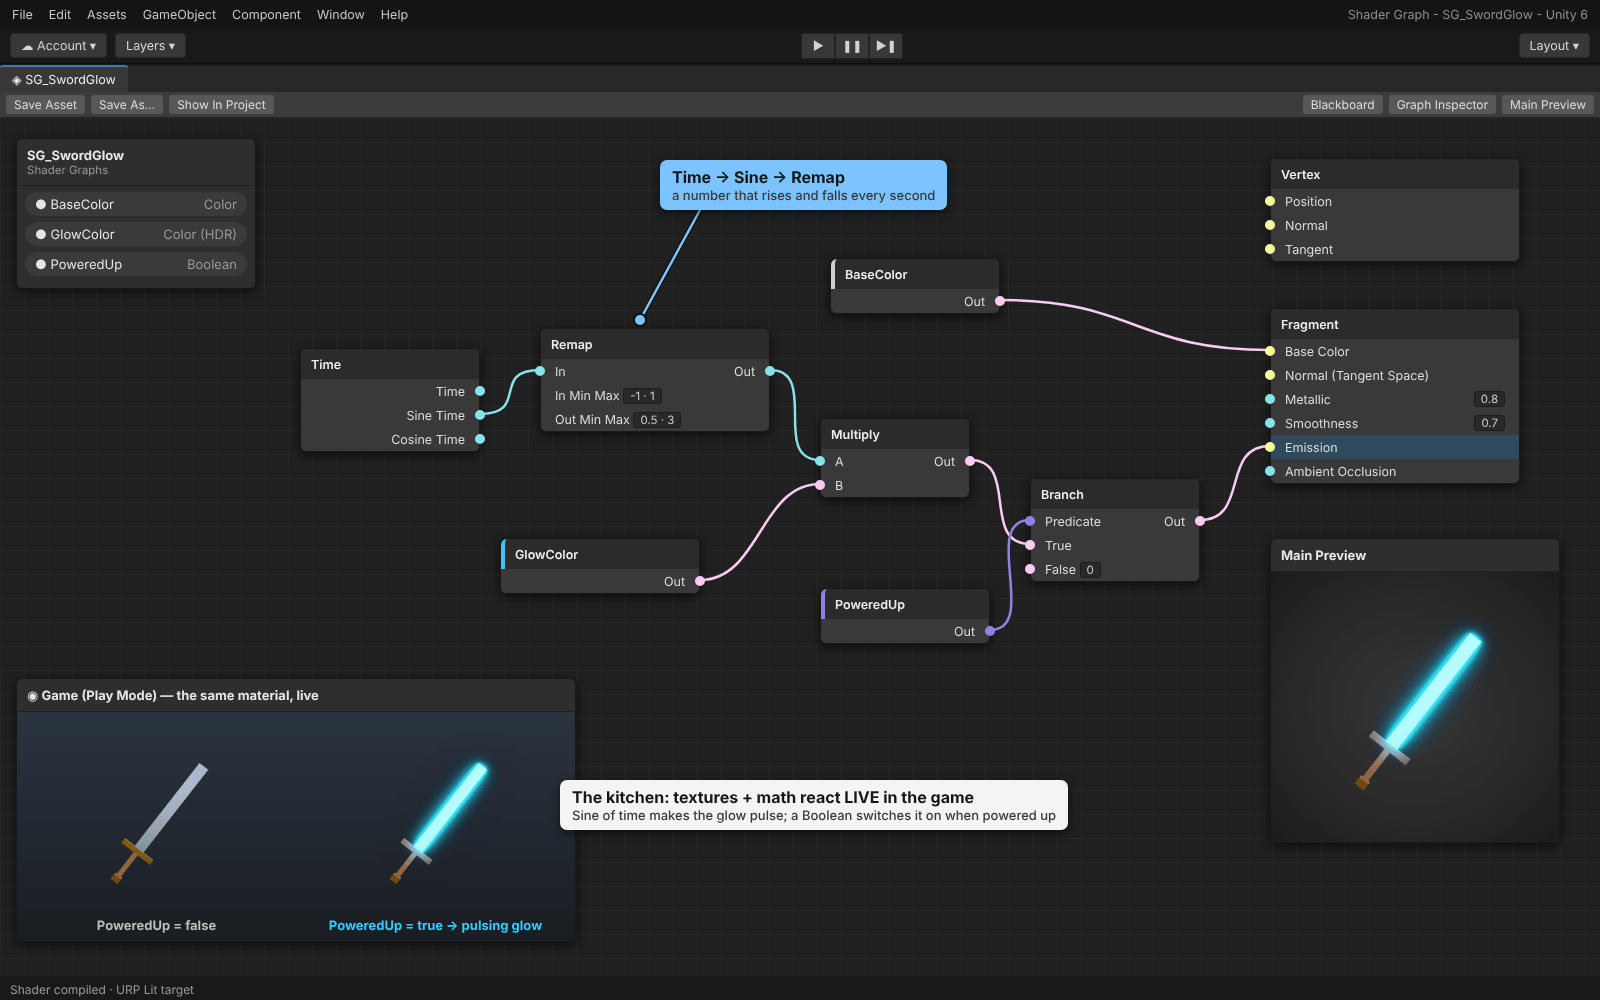
The Kitchen (Unreal/Unity):
Here, we use Shader Graphs to make those textures react live. This is how we make a character’s skin look wet when it rains or make a sword glow when it gains a power-up.
My Final Thoughts
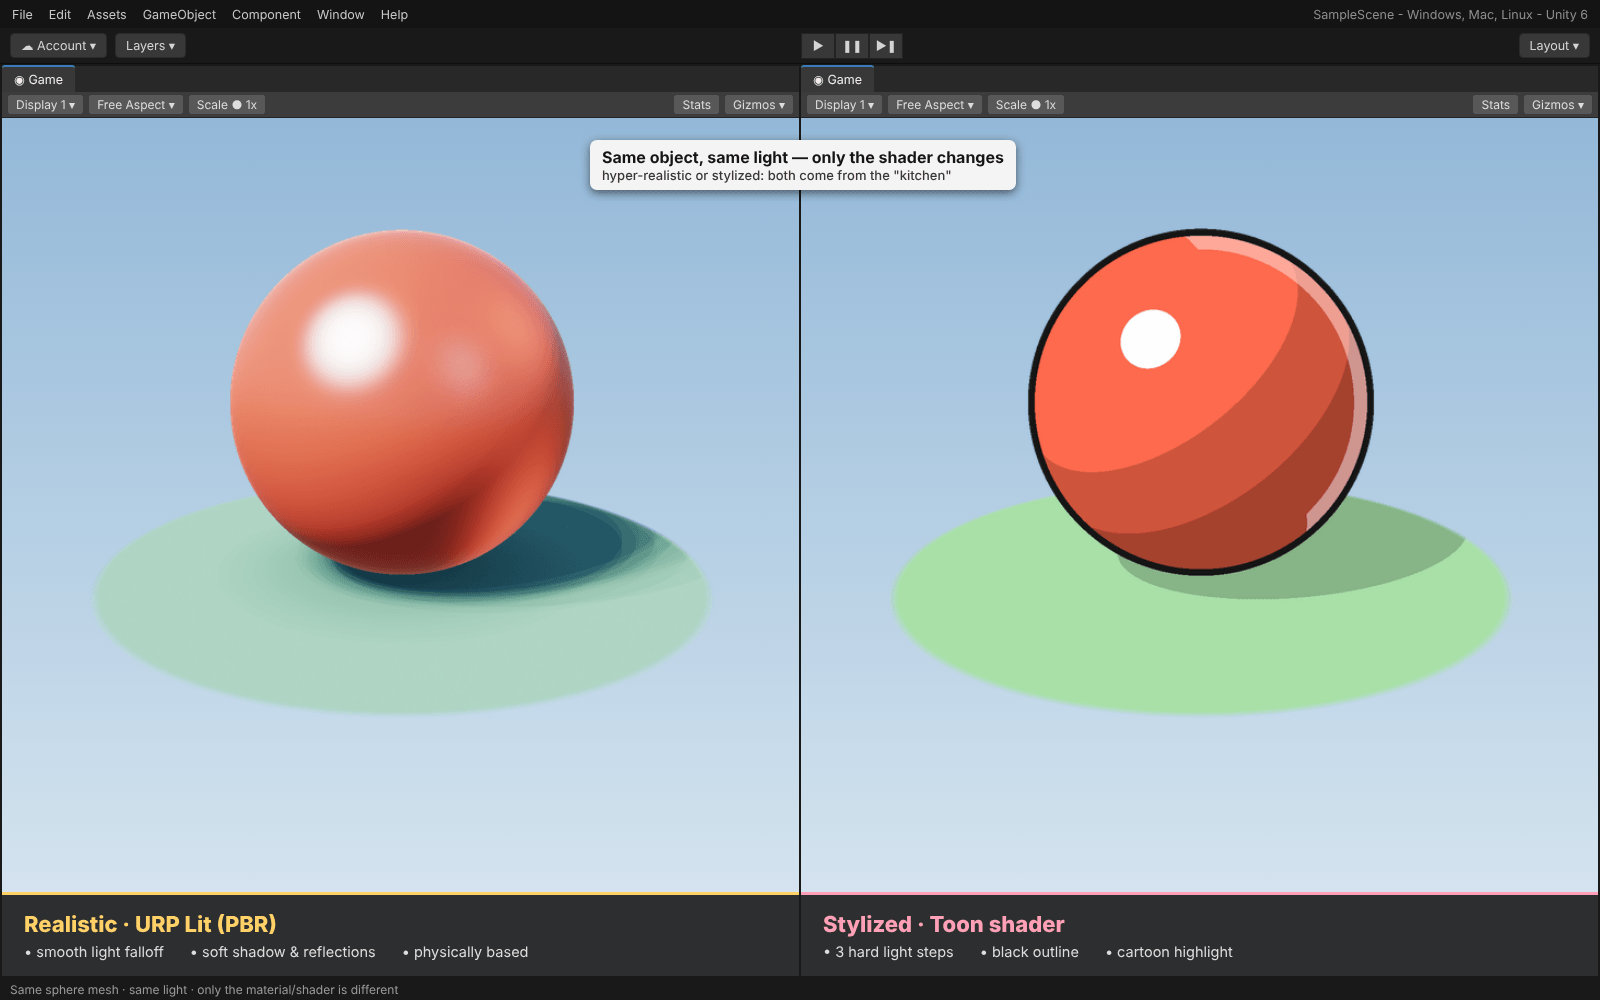
If I can master the bridge between the factory and the kitchen — the Artistic Static and the Technical Dynamic — I think I can create immersive worlds, whether it’s a hyper-realistic environment or a stylized toon-shaded character.
DIGITAL DESIGN FUNDAMENTALS
ON MAY 09, 2025 / GAME DESIGN
Despite several years in game development, I still feel I haven’t fully mastered concepts like Sprites, Meshes, UV Mapping, Shaders, and PBR.
So today, I decided to make a small chat with Gemini in order to refine my understanding on how a digital object -whether flat or three-dimensional- actually gets its look. It was a very fruitful conversation and I could take the following key notes:
1. The Foundation: Understanding 2D Sprites
In 2D design, a sprite is a single image or an animation frame that acts as a standalone object in the game world.
We can think of a sprite like a paper cutout. It is a flat, rectangular image—usually a .png to allow for transparency—that represents a character, a coin, or a background element.
2. The 3D Anatomy: Mesh, Texture, and Materials
When we move into 3D, the “paper cutout” becomes a physical structure. To understand a 3D object, we can look at it as a three-layer sandwich:
The Mesh: The “skeleton” or wireframe (the 3D shape made of vertices and faces).
The Texture: The “skin” (a 2D image file that provides the detail).
The Material: The “brain” (the set of instructions that tells the computer how to handle light and reflections).
3. The Bridge: UV Mapping
As mentioned in “The 3D Anatomy” part, the texture is a flat 2D image wrapped around the 3D shape. But how does a flat 2D image wrap around a complex 3D shape? That’s where UV Mapping comes in.
Gemini gave me the nice example of the chocolate bunny (could be also the chocolate Santa Claus). A hollow chocolate bunny wrapped in patterned foil. If we carefully unwrap that foil and lay it flat on a table, we can see a UV Map.
Why is it called UV mapping:
Since X, Y and Z coordinates are used for 3D space, we use U and V for the coordinates on the 2D texture map. It’s the “instruction manual” that tells the computer which pixel goes on which corner of the 3D model.
4. The PBR Workflow
In digital design, we don’t just use one image for color. We use a Texture Set known as PBR (Physically Based Rendering). There are several so called maps, where each map provides a specific piece of data. The mostly used of them are:
Albedo / Base Color Map (The “No-Shadow” Color):
The pure color (without any baked-in lighting).
Normal Map (The “Fake Detail” Map):
Using a normal map we can add surface bumps and scratches without adding extra geometry to the mesh. It is a specialized map that tricks light into seeing surface bumps and scratches.
Roughness / Metallic:
These are grayscale maps that define how “shiny” or “metallic” a surface feels.
Why using a texture software and a game engine shader graph?
Seems to be a very common question in the game development industry. Here is what Gemini gave as an answer:
The Factory (Substance/Blender):
Here, we “bake” our math into flat images. This is about high-fidelity, static detail.
The Kitchen (Unreal/Unity):
Here, we use Shader Graphs to make those textures react live. This is how we make a character’s skin look wet when it rains or make a sword glow when it gains a power-up.
My Final Thoughts
If I can master the bridge between the factory and the kitchen — the Artistic Static and the Technical Dynamic — I think I can create immersive worlds, whether it’s a hyper-realistic environment or a stylized toon-shaded character.